I
syllabus | assignments | resources | home
IN-CLASS and HOMEWORK
DUE: SEPTEMBER 20, 2010
SUNY ULSTER
DEPARTMENT OF ART, DESIGN, MUSIC, THEATRE & COMMUNICATION
ART 150 Two Dimensional Design Instructor: DINA ALCALAY PEARLMAN
HOMEWORK DUE Monday September 20, 2010
WEB LINK: http://www.wordimagemedia.com/neg-space/transform.html
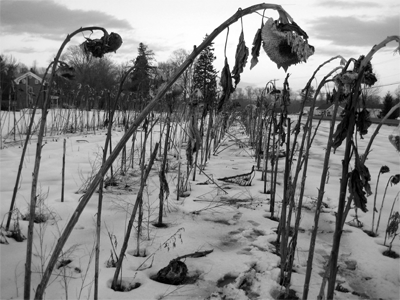
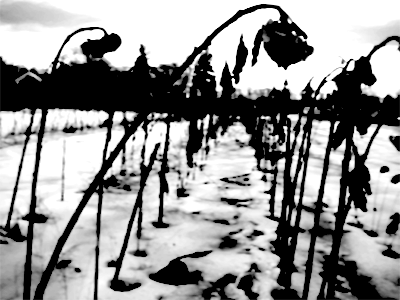
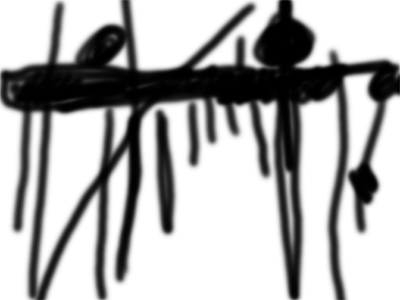
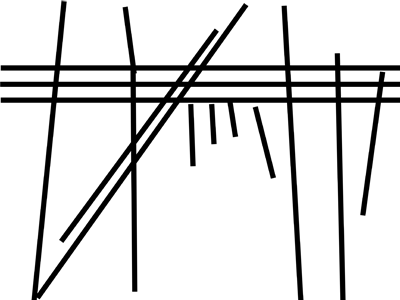
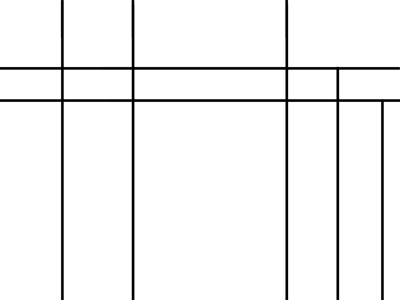
PROBLEM: Transform a representational image (a photograph or photorealistic painting or drawing for example) from it’s original rendering to a basic form: a layout of horizontal and vertical lines (grid) in five progressions.
MATERIALS: Copy machine or computer printer/scanner, flat image (may be photograph, magazine page, drawing or computer print-out, black and white acrylic paint, ink, paper and ruler, choice of final surface can in included: cardboard, museum board, corrugated box material,
PRESENTATION: Five 5.5 x 8.5 inch pieces of paper glued to hard surface such as bristol, poster board, etc.
ESTIMATED TIME TO COMPLETE: 3-5 hours
STEP ONE (EVALUATE PROBLEM)
a) Choose an interesting representational image that has several elements: i.e. NOT a single form but several forms such as a landscape, a still life or a group of people with a background. (Image One)
b) Look at the image critically, what do you see? Content, mood, and subject are all considerations.
c) What are the most basic elements of this composition? Consider placement on page, spacial relationships, variation, repetition, balance, symmetry etc. (refer to FORM vocabulary for review)
d) How will I execute this problem in a way that’s efficient? Plan where you will do your photocopies, or computer print-outs. Local libraries can be helpful, Catskill art, Office Depot, Staples all have photocopy machines. The computer lab is available for you to print out any digital images.
e) Time for materials: Acrylic paint is potentially messy and needs some time to dry, brushes need to be washed etc.
STEP TWO (INVESTIGATE SOLUTIONS)
a) Using tracing paper, create a grid overlay (see example on website). This is YOUR grid, there’s not necessarily a right or wrong, but try several variations before you come to a conclusion. Take the time to do it right: do several overlays, don’t be satisfied with your first solution. (Image Five to be used for reference for the next steps)
b) Create 6-12 “thumbnails” (small mini-sketches) of the three in-between images. You can draw, trace, use copy machine, computer print out, but keep these in your sketchbook as a record, you will be graded on your process.
STEP THREE (EXECUTE SOLUTIONS)
To complete images 2, 3 and 4 use prints outs and/or acrylic paint to create
simplified images.
At least one of the three must be done in acrylic paint.
Use all the elements of FORM such as negative and positive space, repetition,
unity, hierarchy etc. that we’ve explored when creating your image. Refer to
your vocabulary sheet if necessary.
Each image should be able to stand on it’s own visually..
STEP FOUR (EVALUATE)
Be prepared to discuss this in class. You will be presenting your piece. Take notes in your sketchbook about which elements you chose to emphasize to aid in your discussion. For example,
“I chose to focus on the tree in Van Gogh’s “Starry Night” because it had visual hierarchy and was predominant in the foreground; it is the strongest vertical in the composition, and it insinuates spacial tension with the moon in the sky.”
EXTRA CREDIT you may hand in one or two paragraphs summarizing the evaluation
step described above. If you choose to do this, please submit as a printed
out Word Processed document.
CONSIDERATIONS:
Part of this assignment is to explore your work process as well as the outcome.
Plan your time wisely.
Plan your materials and process to work within your means— if you are comfortable with rendering by hand, but have never used a computer graphics program, use your strengths here to work for you.
You may crop an image to fit the work space of 5.5 x 8.5 inches, but do so at Step One, not after you’ve been working for several hours.
Keep your thumbnails, and “mistakes” handy in your sketchbook. I will be grading on process as well as outcome.
|
 |
 |
 |
 |
 |